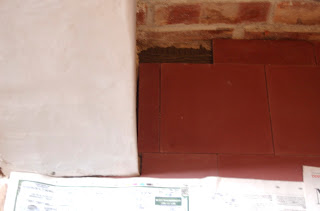
Tiles of bliss - Konni's erste selbstverlegte Fliesen
 My first tile project. This was very enjoyable, I must admit. Never thought I could do this. So here we go, step by step. I used the red cement tiles which were left over from our kitchen floor. They're beautiful tiles made by a company in Portugal called ArteVida. However, you may remember the 'Tiles of terror' post, where I wasn't too happy with the result we got from a professional tiler (associated with a British tile sales chain). So I was hoping to lay these tiles correctly, with as thin a joint as possible.
 1) First I layed out the tiles 'dry', working out the best way to space the whole tiles and how to achieve the 'brick bond' pattern which we have in the kitchen.
 2) Our brickie, Lenny, had done some experiments with cutting the tiles using his angle grinder with a diamond blade, but the results weren't too good: very frayed edges and it was difficult to cut straight lines. So I went to Screwfix and bought their cheapest diamond blade water-cooled tile cutter for the right side of 50 quid. I also invested in a better quality blade, which made a huge difference.
Marking the tiles and cutting...
I spread on the adhesive with a toothed trowel, but the stuff was hardening quite quickly - I think you have about 15 to 20 minutes once it's spread out, so I shouted for help from David to help me, by passing the tiles in the right order. Here you can see the famous 'buttering floating' method, where you spread the adhesive on the floor and on the tile. I learnt how to do all of this by watching this instruction video from a German cement tile manufacturer again and again and again...
Only one small piece to go...
Grouting was a bit of a puzzle. In the video, they say that you shouldn't use ready made grout, as it may leave a grey film on the tiles. They recommended a mix of Quarzsand and Trasszement, neither of which is easy to come by in the UK, it seems. I did have some Trass (also called pozzolan), left over from lime work we did last year. So first I mixed that up with sand and water, and grouted. Only afterwards, I realised that pozzolan on its own does not set at all. So I raked it all out and made a mix of pozzolan and cement (with the hope it would result in a Trasszement), then mixed it with water. It seems to have done the trick - the grout has set after a day - but then the grout lines are so thin, it would probably would have been enough to brush some dirt in... :-)
I did seal the tiles with Filafob before grouting, but I'm not too confident in this product, as the tiles still absorb water afterwards. So I also rubbed them down with some linseed oil, which seems to go in nicely.
Here's the finished result: beautiful cement tiles, very little 'lippage' (Ueberzaehne) and even grout lines. One happy Konni - and all is ready for the stove to be delivered next week.


